News
How to Make a Flag: The Complete DIY & Pro Guide
Flags are more than fabric—they’re symbols of pride, identity, and creativity. Whether you’re crafting a porch house flag, a garden display, a tailgate banner/pennant, or a DIY school project, learning how to make a flag (including custom flag printing, bunting, and kid-safe builds) is both fun and affordable. This guide covers DIY flag paths from fast paper to durable dye-sublimation polyester, with professional tips from FlagOh to help your flag stand tall and endure sun, wind, and UV.
Decide by Use Case: Where It Hangs, How Far It’s Seen, How It Mounts
Before cutting fabric or grabbing paper, ask: Where will this flag fly—whether it’s a porch display, a pennant flag, or a classroom project? The answer shapes everything—size, material, mounting, and budget.
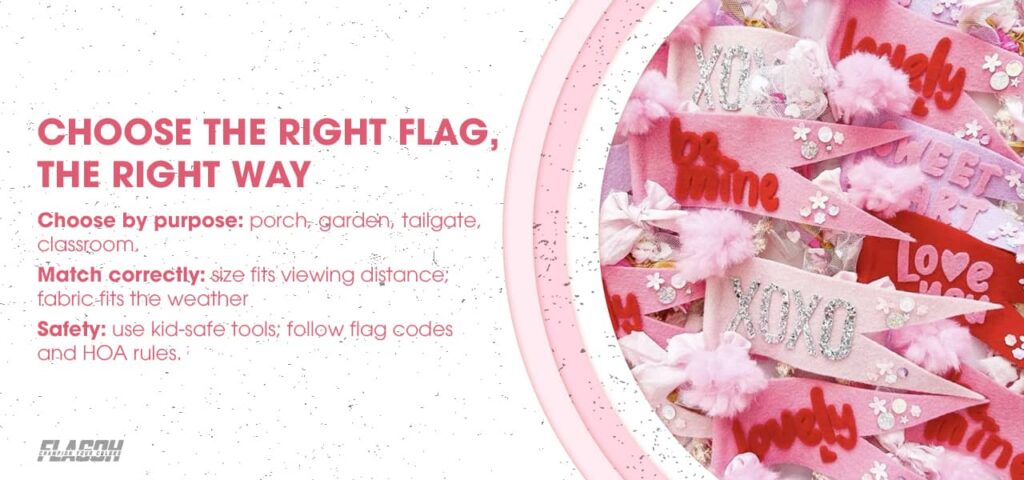
Viewing Distance → Size Rules
A flag should be legible at a glance. Use these quick ratios:
| Flag Size | Ideal Viewing Distance | Common Use |
| 12×18 in (30×45 cm) | 3–5 m (10–16 ft) | Garden, desks, kid projects |
| 2×3 ft (61×91 cm) | 5–8 m (16–25 ft) | Apartments, paddocks |
| 3×5 ft (91×152 cm) | 7–10 m (20–30 ft) | Porches, garages, tailgates |
| 28×40 in (71×102 cm) | 7–9 m (23–30 ft) | House-mounted sleeve flags |
| 36×60 in (91×152 cm) | 10–12 m (30–40 ft) | Large wall displays |
Mounting Contexts & Flagpole Basics
- Sleeves: Slide over porch poles (28×40 in is standard).
- Grommets: Metal eyelets for 3×5 ft outdoor flags.
- Brackets: 30° or 45° angles help flags catch the wind.
- Telescoping Poles: Great for tailgates—collapse for travel.
Durability vs Budget Matrix
- Polyester (150–200 GSM): $10–$15/yard; strong balance of cost + outdoor durability.
- 210D Nylon: $20+/yard; premium, withstands 20+ mph winds.
Safety & Legal Fast Rules
- Use blunt scissors or pre-cut kits for kids.
- Don’t leave flags near open flames.
- When displaying national symbols, review your country’s flag code and any HOA/school policy or municipal bylaws—especially for pole height, bracket placement, and quiet hours.
Decide the flag’s job, match size to distance, pair fabric to weather and budget, and mount safely—build once, fly proudly.
Quick Single-Flag Builds: Paper/Poste & Simple Cloth
Short on time? These three quick builds—paper/poster, simple cloth, and a pennant banner—use common supplies and clear steps so you can go from idea to display in under two hours. Pick the path that fits your budget and where the flag will hang.
Paper/Poster Flag (indoor/temporary, kid-safe)
- Time: 30–45 min • Cost: <$5 • Skill: Beginner
- Size: ~17×22 in (2×2 Letter/A4) or 22×28 in poster board
- Materials: 4× Letter/A4 or 1 poster board; clear/painter’s tape; ⅜–½ in (10–12 mm) dowel or taped paper tube; markers/paint/stickers; blunt scissors; ruler; optional hole punch, short string/ribbon.
- Steps: Make a 2×2 taped panel; add a reinforced 1 in (25 mm) hoist edge; wrap-tape to pole every 2–3 in (5–7 cm); decorate with large, high-contrast shapes; optional leash via two punched holes; optional ribbon/tassel.
Simple Cloth Flag (outdoor/indoor)
- Time: 60–90 min • Cost: $15–$25 • Skill: Beginner–Intermediate
- Sizes: 2×3 ft (61×91 cm) or 12×18 in (30×46 cm)
- Materials: Polyester 150–200 GSM (outdoor) or cotton (indoor); sewing machine or fabric glue/hem tape*; polyester thread; tape measure; fabric shears/rotary cutter; pins/clips; iron; dowel/house pole or garden stand; optional grommet kit.
- Steps (2×3 ft): Cut 24×36 in; double-fold ¼ in (6 mm) hems on top/bottom/fly and stitch (or hem tape/glue); make a 1.5 in (38 mm) sleeve at hoist and stitch; reinforce hoist corners; mount and check drape.
Pennant Banner (Bunting): Decorative String (Not a Single Flag)
- Time: 30–60 min • Cost: $5–$10 • Skill: Beginner
- Pennants: Triangles 8–10 in (20–25 cm) tall; spacing 3–4 in (8–10 cm)
- Materials: Scrapbook paper/cardstock/felt (felt tolerates light moisture); twine/ribbon/bias tape (span + ~24 in / 60 cm for tying); hole punch or sewing machine; scissors/rotary cutter; ruler/triangle template.
- Steps: Cut a triangle template, trace and cut pennants, then string them by hole-punching (thread twine) or sewing along the top; keep 3–4 in spacing, knot to lock, leave ~12 in at each end to tie, hang with hooks/tape, and use kid-safe tools indoors/under cover.
Keep it simple: size for visibility, choose indoor vs outdoor materials, and mount securely. Start with the paper option for speed, try the cloth build for durability, and use kid-safe tools throughout—then fly it with pride.
Materials & Build Methods Explained
Before you start cutting or sewing, it helps to know what materials and methods actually work for flag making—especially if you’re planning a DIY garden flag. Each option—whether it’s fabric choice, decoration style, or build type—comes with trade-offs in cost, durability, and appearance.
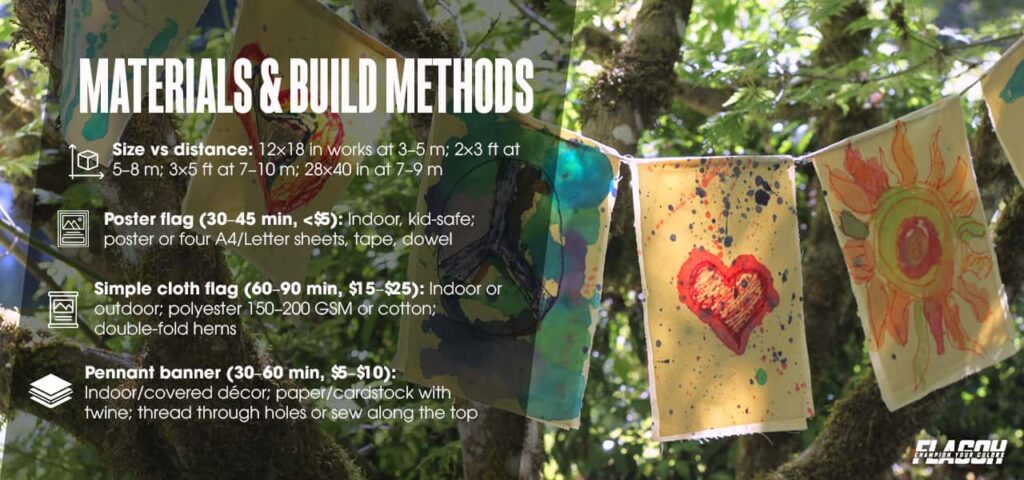
Fabric 101: Cotton, Nylon, Polyester, Blackout/Liner
- Cotton: budget-friendly; best indoors; lower UV resistance.
- Polyester (150–200 GSM): balanced cost/durability; ideal for dye-sublimation prints.
- Nylon 210D (denier): excellent wind performance; quick-dry; 2–3× the outdoor life of cotton.
- Blackout liner: increases opacity for double-sided builds; reduces bleed-through.
Graphics Options: Print, Appliqué/Sew, Heat-Bond/Vinyl
- Print: Fast, full-color, but fades after 12–18 months outdoors.
- Appliqué: Cut fabric shapes stitched on; durable but time-heavy.
- Heat-bond/Vinyl: Affordable, crisp graphics, works with Cricut.
Single- vs Double-Sided Builds
- Single-sided: cheaper, lighter, 50% see-through.
- Double-sided: two panels + liner, readable both ways, 2× weight.
Pick the fabric and finish that balance strength, look, and lifespan so your flag fits its use and stays looking sharp.
Printing Methods & Color Management (Dye-Sub, Screen, HTV, ICC)
Getting the look you want on a flag often comes down to how the design is applied. From professional printing techniques to home craft tools, each method affects color quality, durability, and cost in different ways.
Printing Methods: Dye-Sub, Inkjet, Screen & HTV
- Dye-sublimation (poly only): Heat-bonded dyes → vivid, wash-fast; best for outdoor polyester flags.
- Pigment inkjet (home-friendly): Use outdoor-rated inks; laminate or heat-seal edges to extend life.
- Screen printing (volume/spot colors): Very durable inks; higher setup cost—great for large runs.
- HTV + plotter (Cricut/Silhouette): Cut letters/logos and press (or iron). Adds opacity for single-sided flags; can layer if overall weight stays reasonable.
Color & File Prep: RGB→CMYK, ICC, Pantone
- Design on screen in RGB, then convert to CMYK with the printer’s ICC profile for accurate output.
- For exact brand hues, request Pantone matching (aka “colour management” in the EU).
- Match method to management: Pick the print process first, then set color profiles so results stay sharp and consistent.
Pick the method for the job—dye-sub for outdoor polyester, inkjet for quick home prints, screen for volume, HTV for sharp logos. Manage color: convert RGB→CMYK with ICC, and use Pantone when exact brand hues matter.
Step-by-Step Builds
Once you’ve chosen your materials and design, it’s time to bring the flag to life—this is where how to make a flag becomes practical. These build guides walk you through simple steps to go from loose fabric or paper to a finished piece you can display with pride.
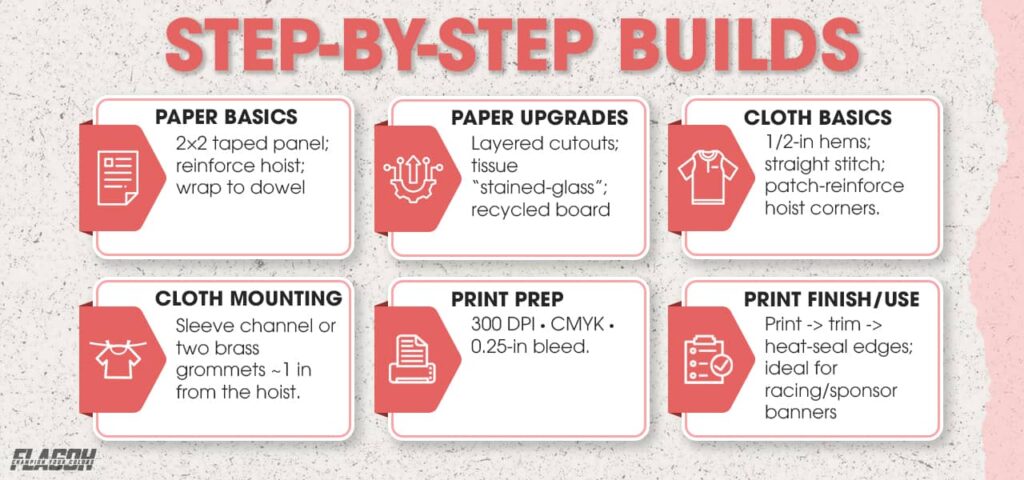
Paper/Poster Flag (Tube Pole + Taped Panel)
Creative & Practical Upgrades (one quick set):
- Layered texture: Add cut shapes (stars, stripes, mascots) on the base for a bold, dimensional look.
- “Stained-glass” glow: Cut small windows and back them with tissue paper so the flag lights up in sunshine.
- Eco base: Swap paper for recycled cardboard—it holds shape in the wind and takes chalk or paint beautifully.
- Secure & comfy: Punch two holes along the fold, thread the string to tie around the dowel, and wrap the grip with fabric/athletic tape.
- More visibility: Tie a tassel or ribbon at the pole top for movement that pops in crowds.
Sewn Cloth Flag (Hem, Reinforced Corners, Sleeve/Grommets)
- Fold ½ in hem, sew a straight stitch.
- Reinforce corners with patches.
- Add 2 brass grommets (about 1 in from edges).
Printed Poly/Vinyl Flag (Home Printer or Local Shop)
- File size: 300 DPI, CMYK, bleed margin 0.25 in.
- Print → trim → heat-seal edges.
- Works well for racing flags or sponsor banners.
Follow the steps and choose the build that fits your needs—paper, sewn cloth, or printed—so the project stays manageable and personal.
Hardware & Mounting: Poles, Grommets, Sleeves, Brackets, Anti-Wrap
Even the best-made DIY flag needs the right setup to fly properly. Mounting hardware and anti-wrap add-ons work together to keep your flag secure and legible in different environments.
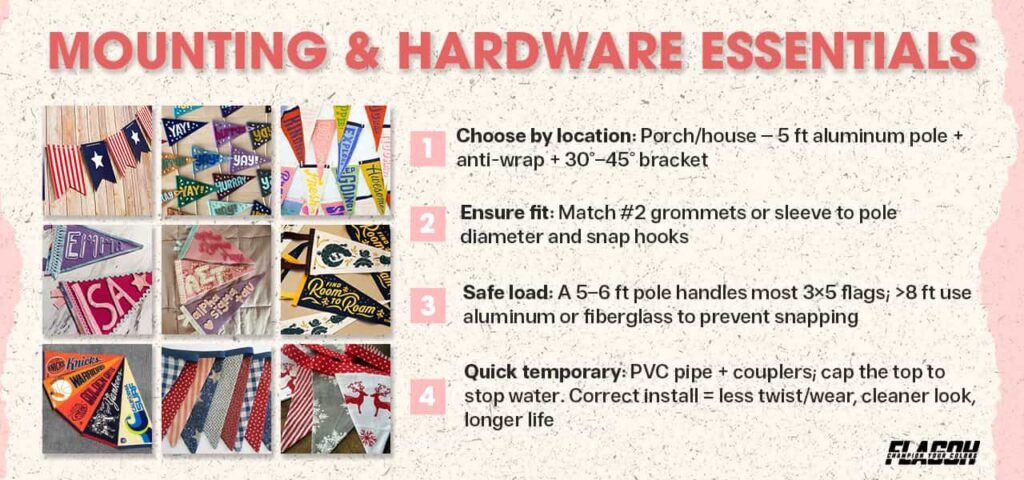
Choose Hardware by Location
- Porch/House flag: 5 ft aluminum pole with anti-furl kit; 30°/45° bracket; match #2 grommet or sleeve fit.
- Tailgate: 10–12 ft telescoping fiberglass pole; secure with base mount; check wind exposure on highways.
- Fence/Wall: stainless hardware; confirm pole diameter vs snap-hooks; consider rope & toggle for traditional banners.
Safe Installation & Load Basics
- Poles 5–6 ft handle most 3×5 flags.
- Over 8 ft? Go with aluminum or fiberglass to avoid snapping.
DIY Flagpole Quick-Start
- PVC pipe + couplers → cheap temporary solution.
- Cap top to avoid water pooling
Match hardware to location and install correctly to prevent twist and wear—your flag will last longer and look cleaner.
Flag Hardware Anatomy & Specs
Behind every well-flying flag is a set of small but important parts that work together. From ropes and grommets to finials and anti-wrap kits, knowing what each piece does helps you choose the right setup and avoid common problems like twisting, noise, or wear.
Rope & Toggle, Halyard, Cleat, Truck & Finial — extra know-how
- Rope choice: A low-stretch polyester halyard (braided) resists UV better than nylon and keeps flags from creeping down over time.
- Quiet setup: Add a small shock cord or foam spacer where the halyard meets the pole to stop nighttime clatter.
- Final tips: Ball finials shed rain and protect the halyard from snagging. In storm seasons, avoid tall conductive finials or add proper lightning protection.
Grommet Sizes & Pole Diameter — practical upgrades
- Spur vs plain washers: Spur grommets bite into fabric and hold better on outdoor flags than plain washers.
- Measure once: Check the outside diameter (OD) of the pole and the snap-hook opening so the hardware closes fully without rattling.
- Swivels help: A stainless swivel shackle between snap hook and grommet cuts twist and reduces edge wear on long, windy days.
Anti-Furl / Anti-Wrap Kits — setup that actually works
- Placement: Install the ring(s) just above the sleeve or top grommet, leaving 2–3 cm (≈1 in) of clearance so the header can move but not spin freely.
- Two-point control: Pair a top anti-furl ring with a lower guide clip; controlling both ends keeps graphics facing out more consistently.
- Seasonal check: Inspect sleeves, clips, and rings monthly for UV cracking; replace plastic components that go chalky or brittle.
Matched, well-maintained hardware keeps the flag secure and sharp—and smart upgrades extend pole and fabric life.
Design & Build Planner: Visibility, Time & Budget
Strong flags pair clear visuals with a plan you can execute. Use these cues to keep graphics legible on any DIY flag, then pick the build that fits your time, cost, and skill.
Big Type & Simple Geometry
- Use 2–3 high-contrast colors for instant recognition.
- Add a 2–4 mm outline to lettering to prevent washout.
- Favor bold sans-serif over thin fonts for distance readability.
File Setup Basics
- Vectors (.AI, .SVG) scale cleanly; rasters (.JPG, .PNG) should be 300 DPI at print size.
- Convert to CMYK with the printer’s ICC profile; request Pantone matches for brand accuracy.
- For HTV (Cricut/Silhouette), RGB mockups are fine—test a small swatch first.
Build Time & Budget Snapshot
| Build | Time | Cost | Skill |
| Paper Flag | 30 min | <$5 | Beginner |
| Cloth Flag | 60–90m | $15–$25 | Intermediate |
| Double-Sided Nylon | 2–3 h | $30–$50 | Advanced |
Lock in a clean design, prep files correctly, and choose a path that matches your resources. The right mix of legibility choices and a realistic build plan delivers a flag that looks crisp—and gets finished on schedule.
Care, Weatherproofing & Repairs
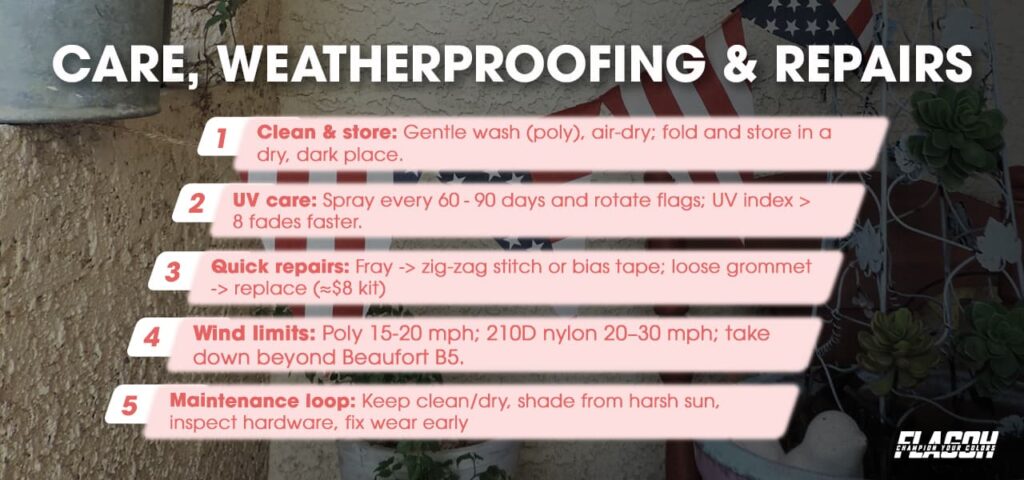
A flag lasts as long as you care for it. Simple habits—gentle cleaning, dry storage, UV protection, and quick touch-ups—do more for lifespan than any single upgrade. Think routine, not rescue.
Cleaning & Storage
- Wash polyester flags on a gentle cycle, air-dry.
- Store folded in a dry, dark space.
- For high UV index regions, apply UV-protectant spray every 60–90 days and rotate flags to extend color life.
Re-Stitch, Re-Grommet, Edge Tape
- Fray? Sew zig-zag stitch or add bias tape.
- Loose grommet? Replace with $8 hand tool kit.
Weather & Performance Thresholds (Wind, UV, Beaufort)
- Wind rating: Lightweight polyester flags handle steady 15–20 mph (24–32 km/h); 210D nylon tolerates 20–30 mph (32–48 km/h).
- Beaufort scale: B4 (moderate breeze) is ~13–18 mph; B5 (fresh breeze) 19–24 mph—consider taking flags down beyond B5 gusts.
- UV index: Above 8, expect faster fade. Apply UV-safe sprays and rotate flags to extend life.
Build a small maintenance loop: keep it clean and dry, shield it from harsh sun, inspect hardware, and fix wear early. Take the flag down in rough conditions and it’ll stay brighter, fly better, and cost you less over time.
Troubleshooting & Toolkit: Quick Fixes and What to Use
When something looks off, the right tool and a one-minute fix can save the day. Use this quick guide to match common problems with simple solutions and the gear that makes them easy.
Quick fixes by symptom
- Edges curling: add a narrow hem or press with light steam.
- Creases/wrinkles: mist lightly, then iron on low with a pressing cloth.
- Flag sagging on the pole: fit anti-wrap rings or a lower guide clip.
- Colors looking dull: rotate displays, shelter during peak sun, plan a refresh at 12–18 months.
Core toolkit (at a glance)
| Minimum Kit | Nice-to-Have |
| Fabric shears | Rotary cutter + self-healing mat |
| All-purpose thread | UV-resistant polyester thread |
| Dowels | Telescoping poles |
| Tape/glue | Sewing machine + grommet press |
Sourcing tips
- Fabric: local craft shops or JoAnn’s, typically $8–$12/yard.
- Hardware: home-improvement stores or online kits.
- Custom printing: print services like VistaPrint or pro makers such as FlagOh.
Keep a small kit handy and fix issues early to restore shape—and keep the flag flight-ready longer.
Mini-FAQ
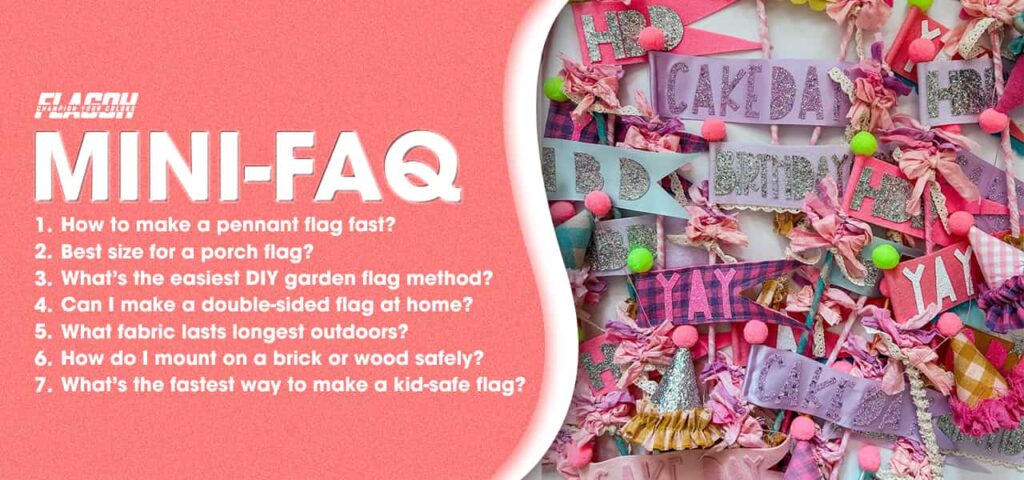
You’ll also find quick pointers on metric–imperial conversions, when it’s smart to take a flag down for high wind or UV, and which hardware upgrades prevent twist. If you’re choosing between DIY and custom printing, we flag the moments where pro finishing (stitching, dye-sub color control) is worth it.
How to make a pennant flag fast?
Cut 8–10 in triangles, fold a 0.5 in edge, tape or stitch, punch holes, and string. For outdoors, use polyester and add a top tassel for visibility.
Best size for a porch flag?
28×40 in fits most house brackets.
What’s the easiest DIY garden flag method?
Sew a 1.5 in sleeve on a 12×18 in polyester panel, hem edges, slide onto a garden stand, and add an anti-wrap ring to prevent twisting.
Can I make a double-sided flag at home?
Yes—sew two panels back-to-back with a liner.
What fabric lasts longest outdoors?
210D nylon or 200 GSM polyester.
How do I mount on a brick or wood safely?
Use masonry anchors for brick; lag screws for wood.
What’s the fastest way to make a kid-safe flag?
Paper + tape + dowel—done in 30 minutes, no sharp tools.With these answers in hand, you can skip the guesswork and focus on making a flag that’s right for your space, your budget, and your purpose. Simple solutions often make the biggest difference
You now have a clear path from idea to finished flag—start simple with a DIY garden flag, then scale up as you master how to make a flag that stands up to sun, wind, and rain. Choose the build that fits your timeframe, apply the right finish, and keep it in shape with simple upkeep. When you’re ready for pro-grade color and stitching, FlagOh has options that look sharp and last.

 Arizona Cardinals Flag
 Atlanta Falcons Flag
 Baltimore Ravens Flag
 Buffalo Bills Flag
 Carolina Panthers Flag
 Chicago Bears Flag
 Cincinnati Bengals Flag
 Cleveland Browns Flag
 Dallas Cowboys Flag
 Denver Broncos Flag
 Detroit Lions Flag
 Green Bay Packers Flag
 Houston Texans Flag
 Indianapolis Colts Flag
 Jacksonville Jaguars Flag
 Kansas City Chiefs Flag
 Las Vegas Raiders Flag
 Los Angeles Chargers Flag
 Los Angeles Rams Flag
 Miami Dolphins Flag
 Minnesota Vikings Flag
 New England Patriots Flag
 New Orleans Saints Flag
 New York Giants Flag
 New York Jets Flag
 Philadelphia Eagles Flag
 Pittsburgh Steelers Flag
 San Francisco 49ers Flag
 Seattle Seahawks Flag
 Tampa Bay Buccaneers Flag
 Tennessee Titans Flag
 Washington Commanders Flag
 Arizona Diamondbacks Flag
 Atlanta Braves Flag
 Baltimore Orioles Flag
 Boston Red Sox Flag
 Chicago Cubs Flag
 Chicago White Sox Flag
 Cincinnati Reds Flag
 Cleveland Guardians Flag
 Colorado Rockies Flag
 Detroit Tigers Flag
 Houston Astros Flag
 Kansas City Royals Flag
 Los Angeles Angels Flag
 Los Angeles Dodgers Flag
 Miami Marlins Flag
 Milwaukee Brewers Flag
 Minnesota Twins Flag
 New York Mets Flag
 New York Yankees Flag
 Oakland Athletics Flag
 Philadelphia Phillies Flag
 Pittsburgh Pirates Flag
 San Diego Padres Flag
 San Francisco Giants Flag
 Seattle Mariners Flag
 St. Louis Cardinals Flag
 Tampa Bay Rays Flag
 Texas Rangers Flag
 Toronto Blue Jays Flag
 Washington Nationals Flag
 Atlanta Hawks Flag
 Boston Celtics Flag
 Brooklyn Nets Flag
 Charlotte Hornets Flag
 Chicago Bulls Flag
 Cleveland Cavaliers Flag
 Dallas Mavericks Flag
 Denver Nuggets Flag
 Detroit Pistons Flag
 Golden State Warriors Flag
 Houston Rockets Flag
 Indiana Pacers Flag
 LA Clippers Flag
 Los Angeles Lakers Flag
 Memphis Grizzlies Flag
 Miami Heat Flag
 Milwaukee Bucks Flag
 Minnesota Timberwolves Flag
 New Orleans Pelicans Flag
 New York Knicks Flag
 Oklahoma City Thunder Flag
 Orlando Magic Flag
 Philadelphia 76ers Flag
 Phoenix Suns Flag
 Portland Trail Blazers Flag
 Sacramento Kings Flag
 San Antonio Spurs Flag
 Toronto Raptors Flag
 Utah Jazz Flag
 Washington Wizards Flag
 Anaheim Ducks Flag
 Arizona Coyotes Flag
 Boston Bruins Flag
 Buffalo Sabres Flag
 Calgary Flames Flag
 Carolina Hurricanes Flag
 Chicago Blackhawks Flag
 Colorado Avalanche Flag
 Columbus Blue Jackets Flag
 Dallas Stars Flag
 Detroit Red Wings Flag
 Edmonton Oilers Flag
 Florida Panthers Flag
 Los Angeles Kings Flag
 Minnesota Wild Flag
 Montreal Canadiens Flag
 Nashville Predators Flag
 New Jersey Devils Flag
 New York Islanders Flag
 New York Rangers Flag
 Ottawa Senators Flag
 Philadelphia Flyers Flag
 Pittsburgh Penguins Flag
 San Jose Sharks Flag
 Seattle Kraken Flag
 St. Louis Blues Flag
 Tampa Bay Lightning Flag
 Toronto Maple Leafs Flag
 Vancouver Canucks Flag
 Vegas Golden Knights Flag
 Washington Capitals Flag
 Winnipeg Jets Flag
 Auburn Tigers Flag
 Clemson Tigers Flag
 Florida Gators Flag
 Florida State Seminoles Flag
 Michigan Wolverines Flag
 Nebraska Cornhuskers Flag
 Notre Dame Fighting Irish Flag
 Ohio State Buckeyes Flag
 Oklahoma Sooners Flag
 Oregon Ducks Flag
 Penn State Nittany Lions Flag
 South Carolina Gamecocks Flag
 Tennessee Volunteers Flag
 Texas A&M Aggies Flag
 Texas Longhorns Flag
 USC Trojans Flag